Möbius Shader
In It’s Clogged, we wanted players to feel cozy while cleaning the room. To support this mood, I explored a cartoony, illustrated look inspired by the Möbius art style—simple flat colors at a distance, enriched with hand-drawn hatching details up close.
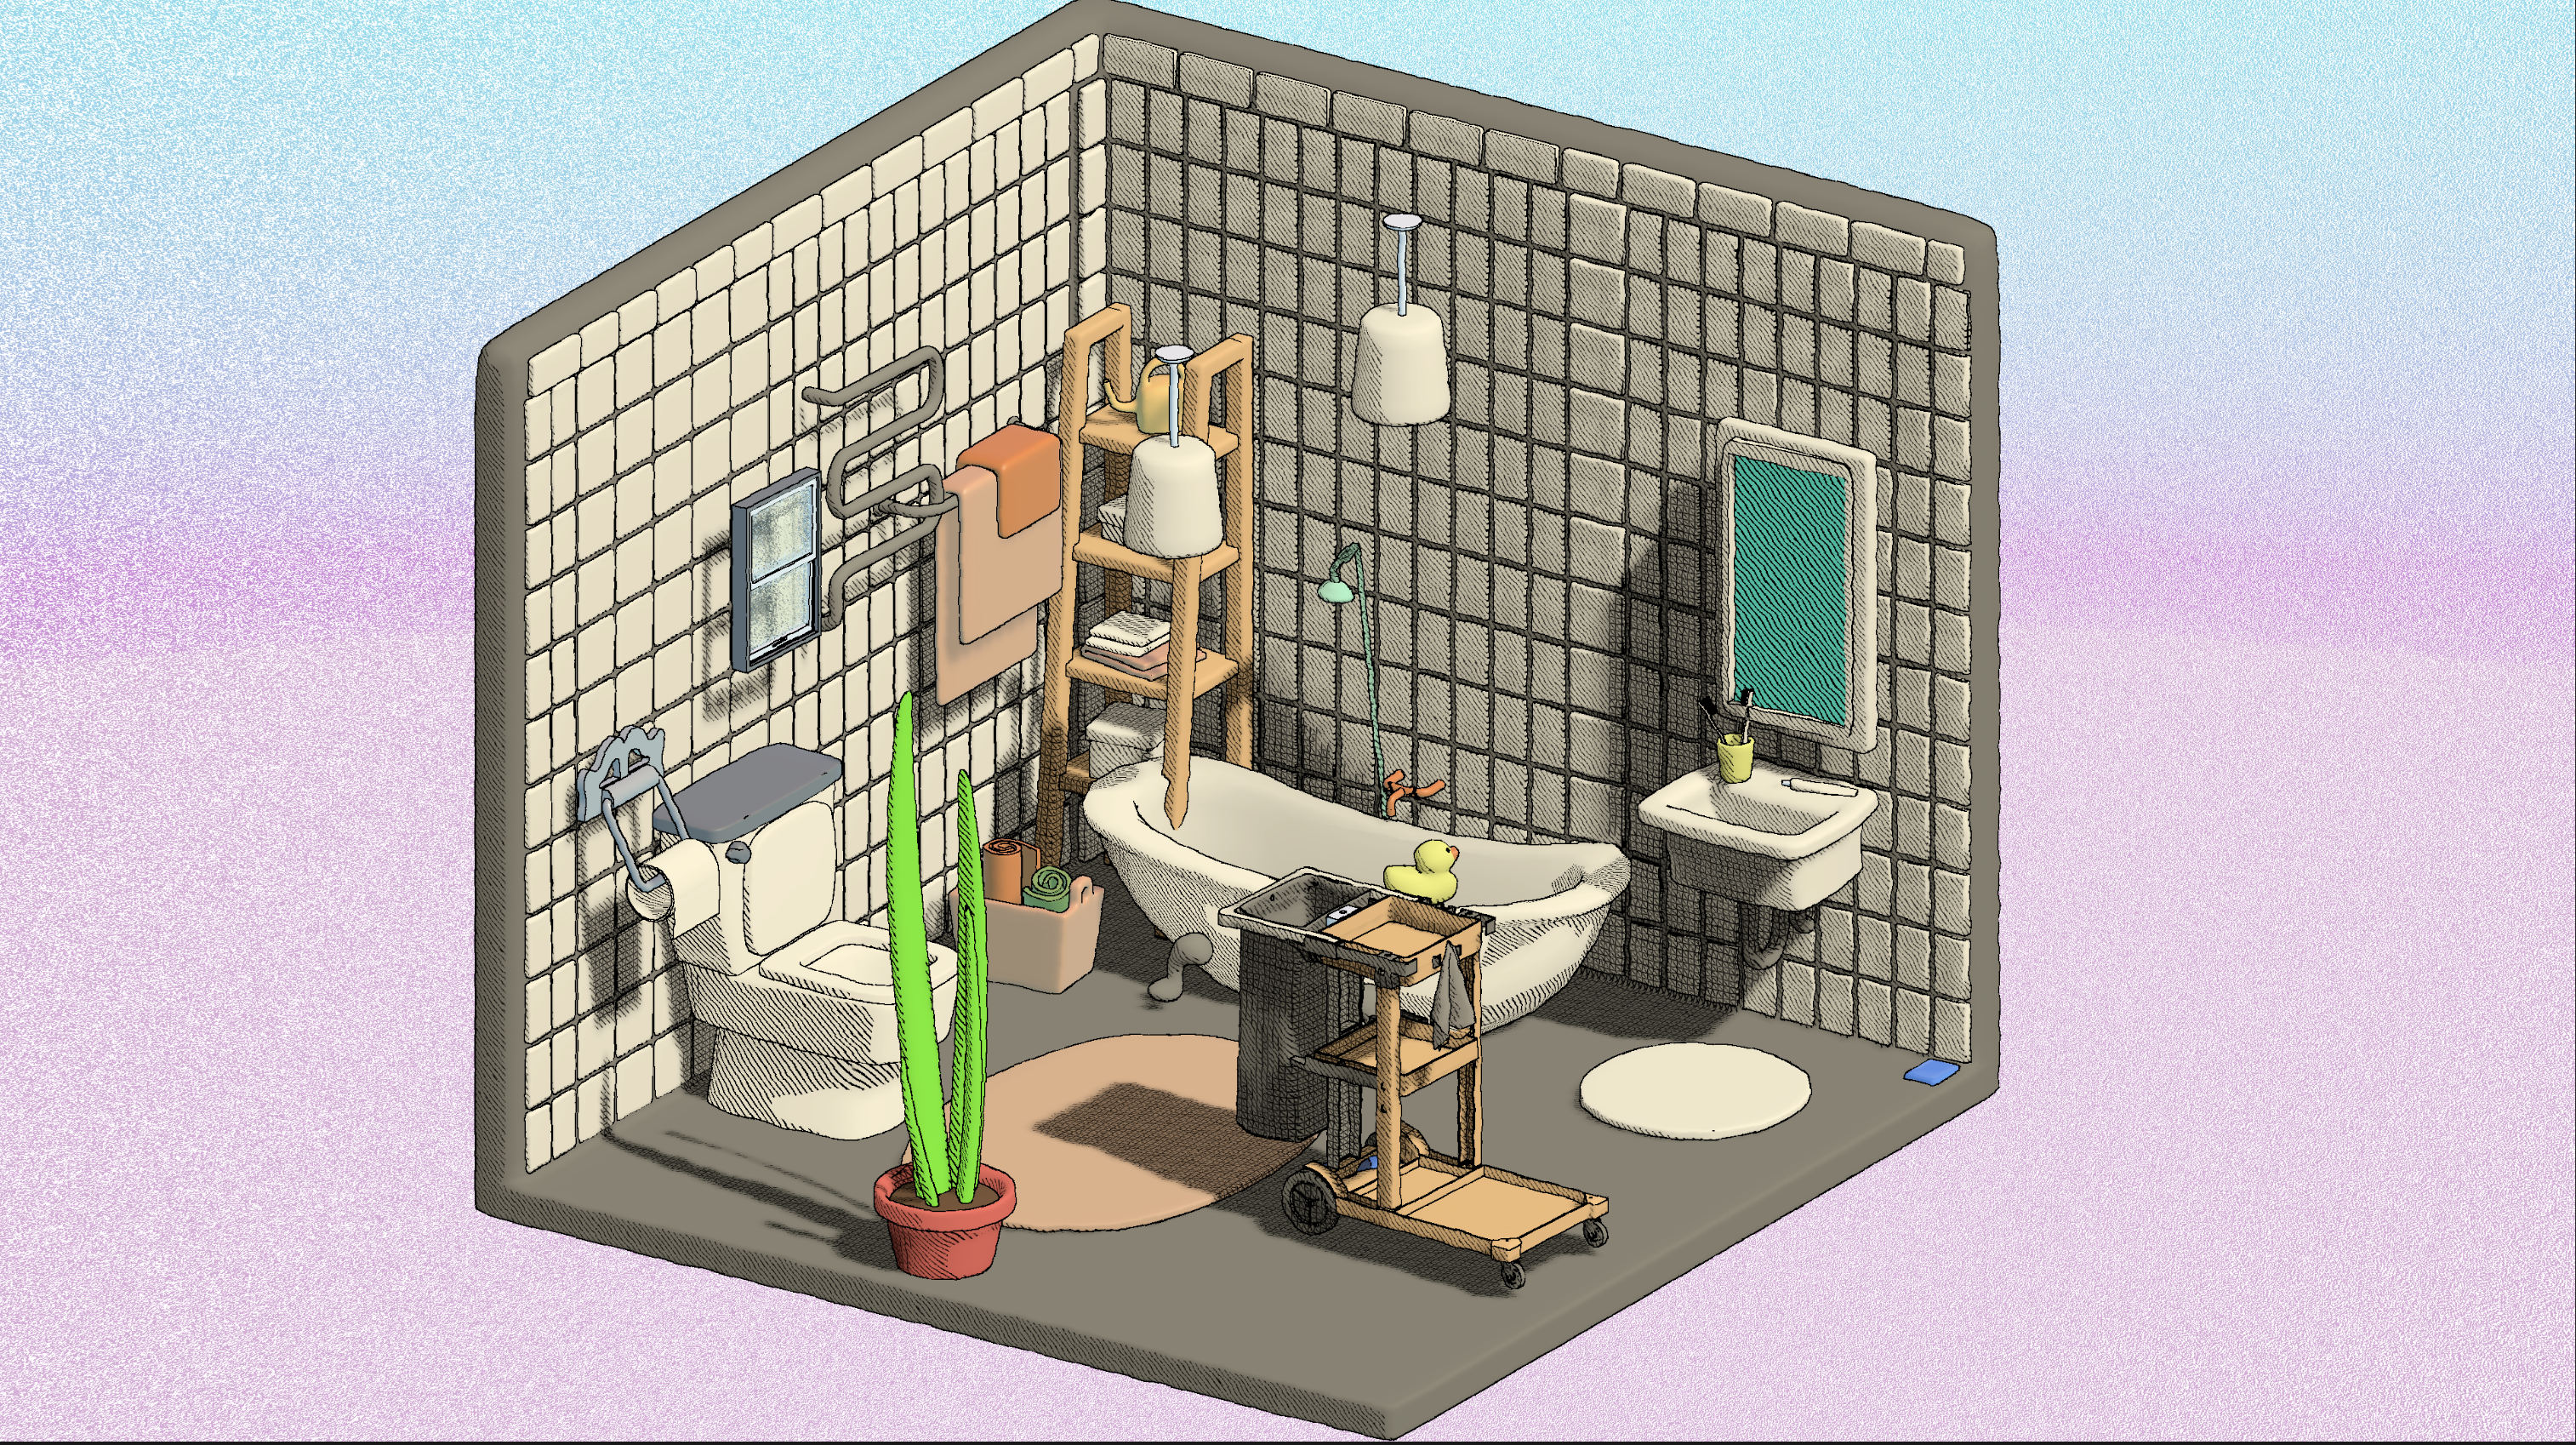 Scene using the Möbius shader, outline rendering created by me explained here, models by our artist Jerry
Breakdown
Hatch pattern
The most defining element of the Möbius style is the hand-drawn hatching. From studying Möbius’s illustrations, I noticed that his hatching lines not only look sketched, but also wrap naturally around the forms. To recreate this, I built a shader that samples a hatch texture and splits it into horizontal, vertical, and diagonal line patterns. These patterns are then layered by brightness to mimic the look of cross-hatched ink.
// Split hatch texture into horizontal, vertical, and diagonal line directions
float flatLine = lineColor.r;
float vertLine = lineColor.g;
float diagLine = lineColor.b;

// Get brightness region
float brightness = shadowAtten? Luminance(lighting): 0.0;
float darkRegion = step(brightness, 0.15) * flatLine;
float grayRegion = step(brightness, 0.3) * vertLine;
float brightRegion = step(brightness, 0.6) * diagLine;
float hatchMask = max(max(darkRegion, grayRegion), brightRegion);
Initially, I tried using mesh UVs to make the hatching follow the surface, but this led to inconsistent orientations and scales across different objects. Assigning unique parameters per material would have been inefficient and hard to manage. Instead, I implemented triplanar mapping, which automatically projects the hatching with consistent texel density and orientation across all meshes. This approach not only preserves the illustrated style, but also removes the need for artists to unwrap meshes when texture maps aren’t required—streamlining the workflow while keeping the visuals cohesive.
// Apply hatch with triplanar mapping
float3 position = i.positionWS - unity_ObjectToWorld._m03_m13_m23; // make WS position translation invariant
float3 lineColorX = SAMPLE_TEXTURE2D(_HatchesTex, sampler_HatchesTex, _HatchesTex_ST.xy * position.yz + displace + _HatchesTex_ST.zw).xyz;
float3 lineColorY = SAMPLE_TEXTURE2D(_HatchesTex, sampler_HatchesTex, _HatchesTex_ST.xy * position.xz + displace + _HatchesTex_ST.zw).xyz;
float3 lineColorZ = SAMPLE_TEXTURE2D(_HatchesTex, sampler_HatchesTex, _HatchesTex_ST.xy * position.xy + displace + _HatchesTex_ST.zw).xyz;

float3 normalWS = length(normal)? normal: float3(1,0,0);
float3 blend = pow(abs(normalWS), 8);
blend = smoothstep(0, 0.8, blend / (blend.x + blend.y + blend.z)); //reduce hatch fading
float3 lineColor = saturate(blend.x * lineColorX + blend.y * lineColorY + blend.z * lineColorZ);
 Hatching with UV hatch, notice the inconsistent orientation and scale
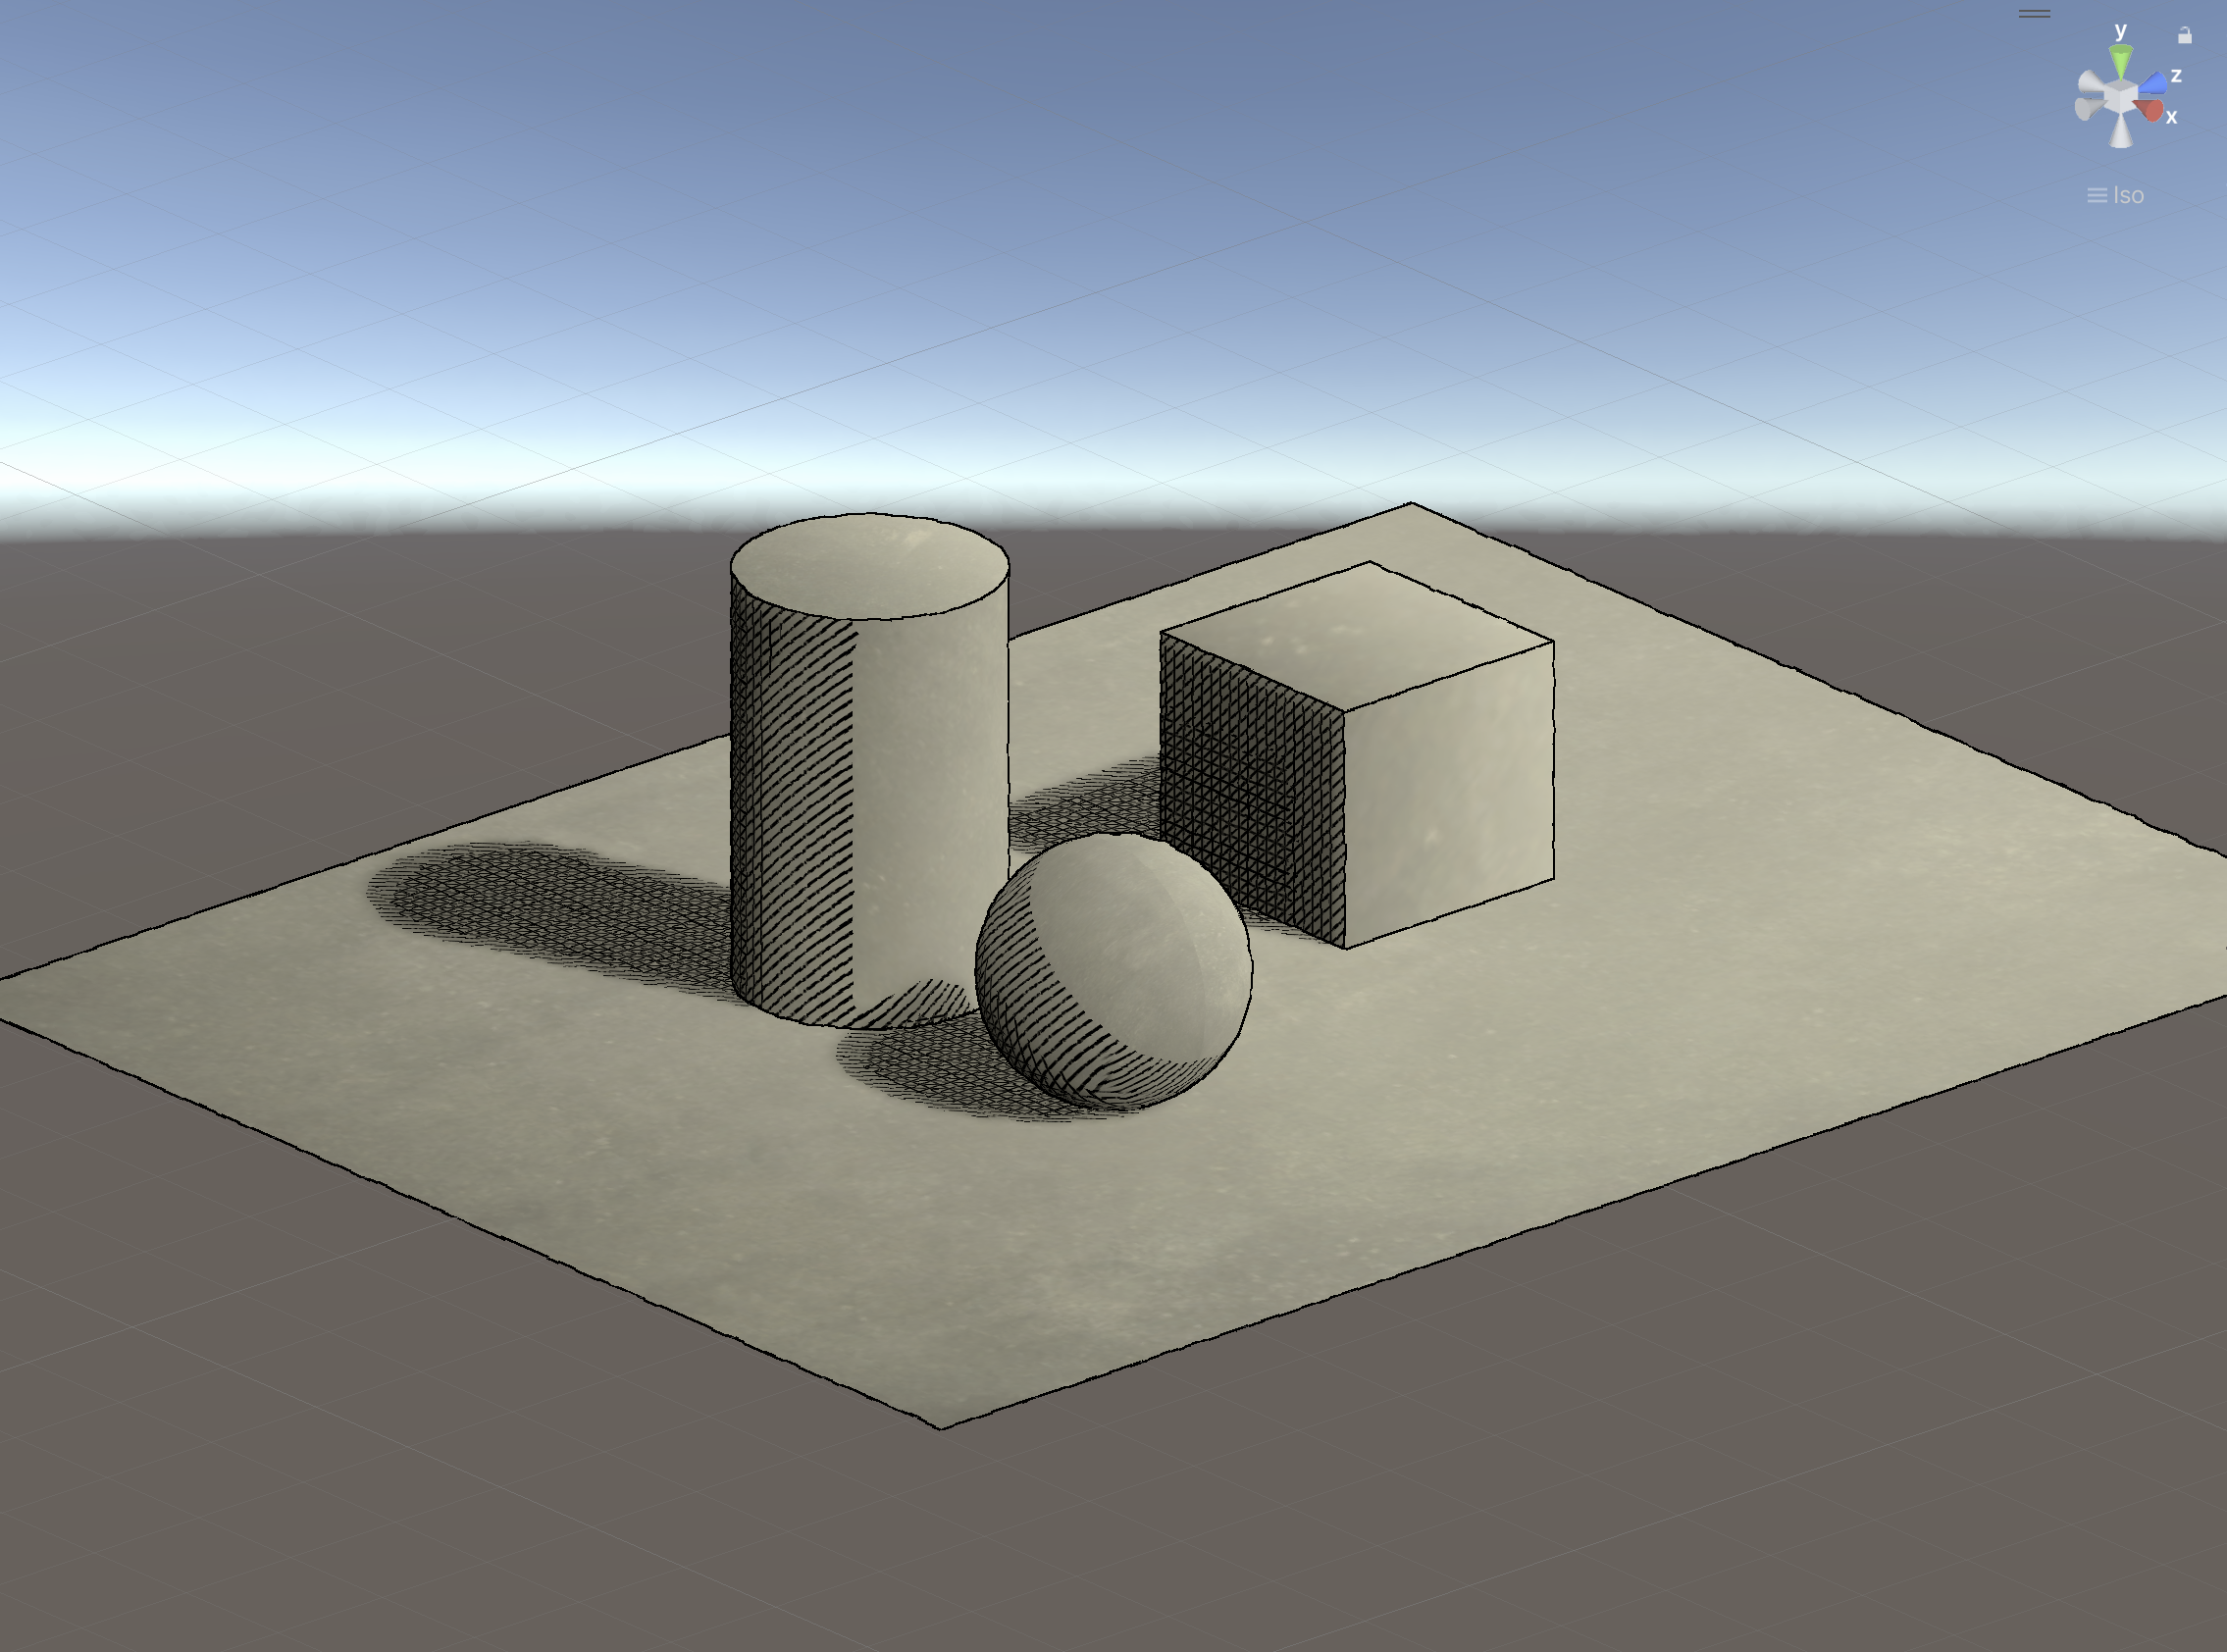 Hatching with Triplanar project, ensures consistent hatching pattern with no UV needed
Color gradient
Another hallmark of Möbius’s art is the use of bold color gradients across objects. A simple implementation would be to lerp colors based on object-space coordinates and dimensions, but this breaks when the same material is applied to meshes of different sizes. To solve this, I stored the gradient information directly in the vertex colors and interpolated those instead. To streamline the workflow, I also built a C# automation script that calculates the gradient values for each vertex and writes them to the mesh automatically. The script runs whenever a mesh is updated or imported, so artists can apply gradients consistently across assets without manual setup.
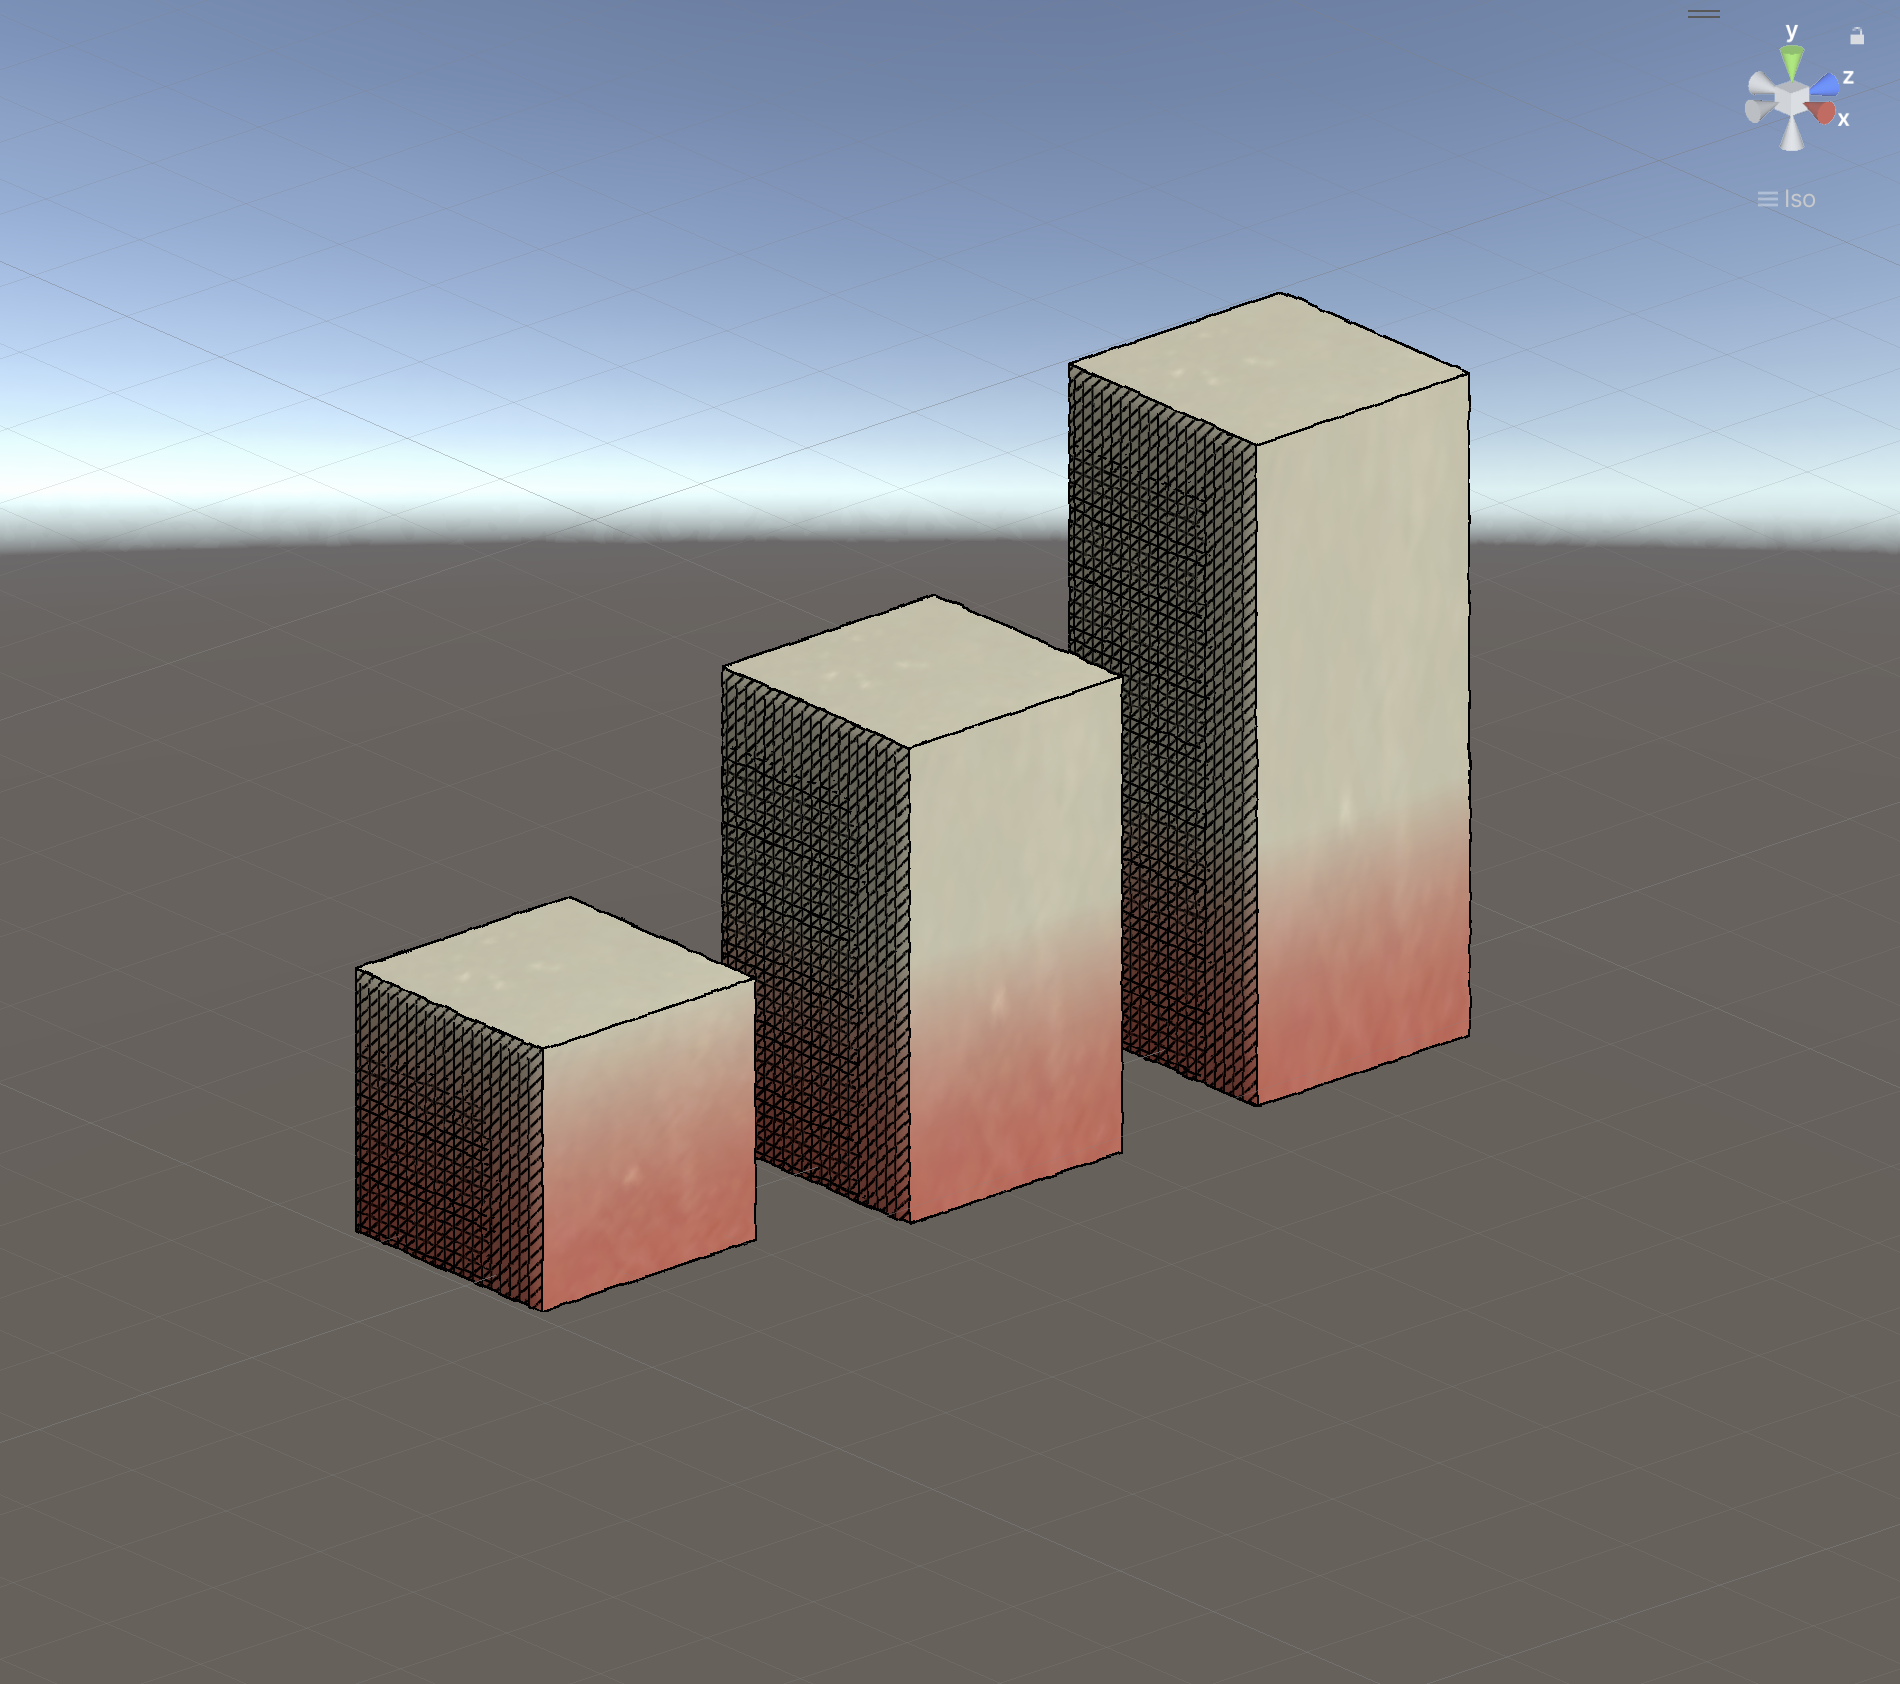 Applying gradient through predefined object dimensions makes it diffcult to apply the same material on different objects
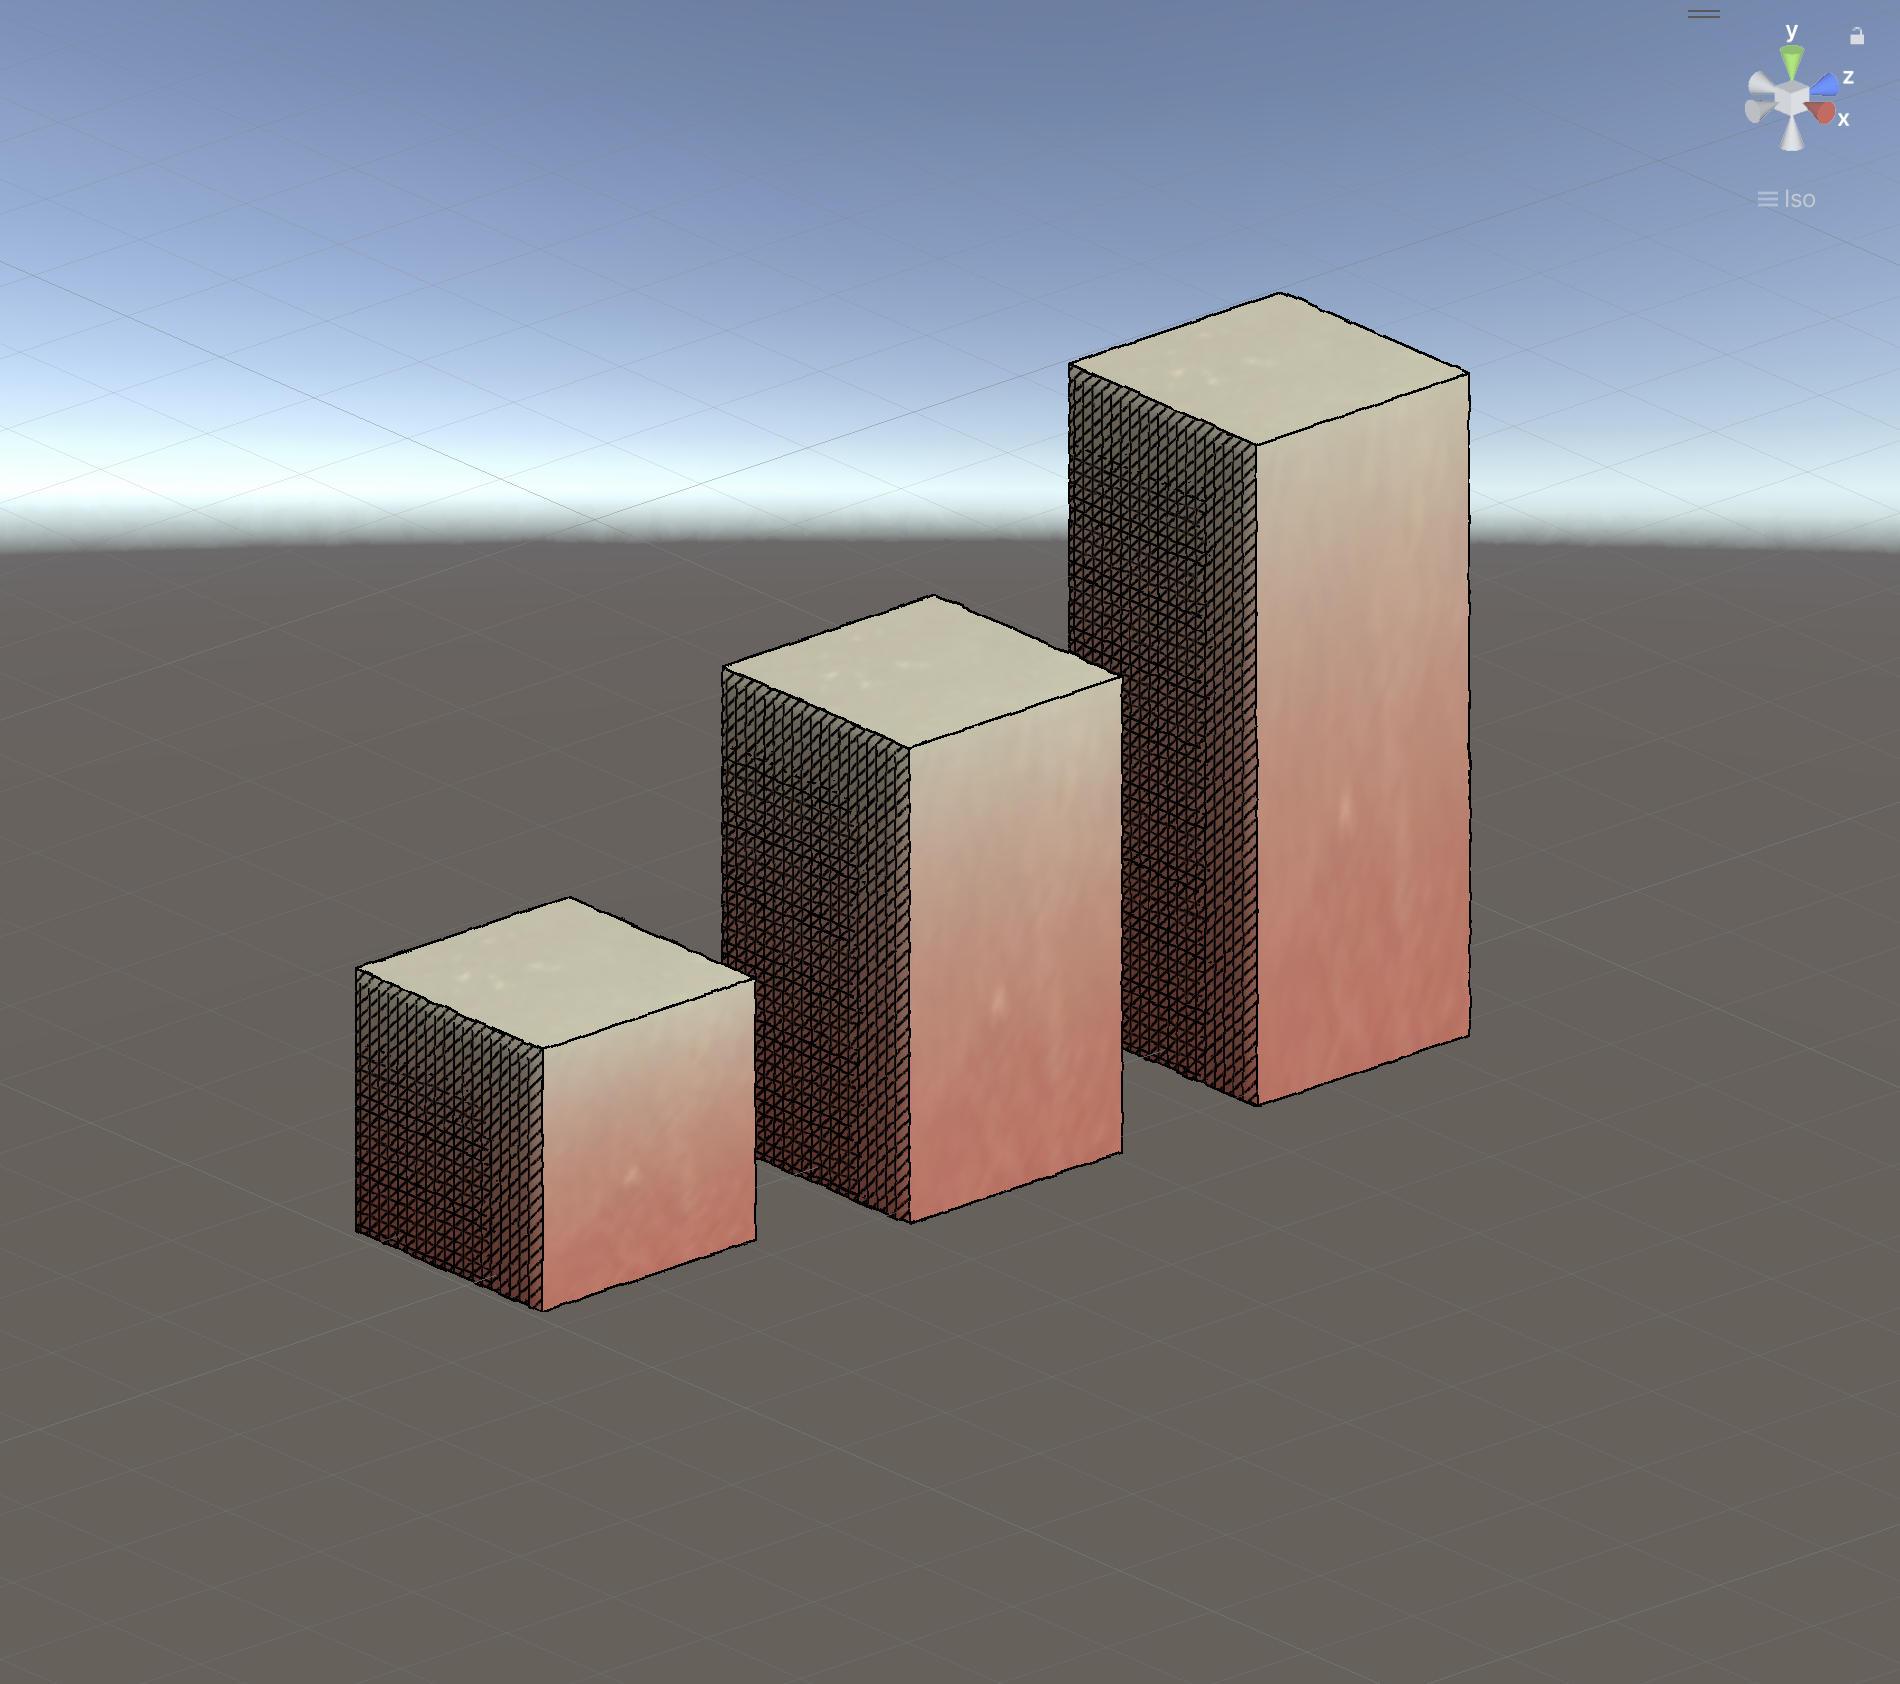 Applying gradient through vertex color fixes the issue
The artist can easily change the gradient color and direction.
Texture maps
To give artists more flexibility, I added support for traditional texture maps alongside the stylized hatching. The shader can sample a basecolor and normal map for color and lighting, while offering three blend modes that control how textures mix with gradient colors. This lets artists freely choose between a purely illustrated look, a more detailed textured style, or anything in between.
// Mix color using shader variant
float4 output = gradient;
#if defined(_MIXMODE_MULTIPLY)
    output = lerp(basecolor, basecolor * gradient, _BlendStrength);
#elif defined(_MIXMODE_SCREEN)
    output = lerp(basecolor, 1 - (1 - basecolor) * (1 - gradient), _BlendStrength);
#else
    output = lerp(basecolor, gradient, _BlendStrength);
#endif
Showcasing texture maps
Showcasing blending texture maps and original color